|
Converting a Verizon E815 (brew) to
Bell's firmware (java)
The following was submitted by Agent B, this is the process of converting your Verizon E815 to using the
Bell E815 firmware (which uses Java).
NOTE: one requirement NOT listed in the below
write up is a USB CABLE... (see the FAQ for cable
info). You MUST have an appropriate USB cable to do this.
I have copied/pasted these directions exactly, and have not modified them in
anyway, except some of the files which were hosted on RapidShare, have been
hosted here (so we don't have to keep up with links)
Please NOTE: THE MAJORITY OF THIS process is copied directly from Evade's process for converting an Amp'd E816 to the Bell E815 firmware, and
getting it working on Verizon's network.
Prior to attempting this it is suggested to backup the
following...
Use Qualcomm QPST to backup service programming..... Unplug your
phone from the PC, power it off, then back on, and re-connect it to the PC.
Use the QPST Configuration program, make sure your phone is
displayed/available... Select the port with your phone, then use the Start
Client pull down, select Service Programming. At the
phone selection screen, your phone should be listed and highlighted, click OK.
Click the READ FROM PHONE button. On the "Enter Service Programming Code"
screen, enter 000000 (or your phones SPC), and click OK. When the
read is complete, and you see values filled in, click the SAVE TO FILE button.
The file name box will automatically be filled in as your phone's ESN
number followed by _SP... (example: 1A3333Ad_SP) click the
Save button. Click on the Connection pull down in QPST Service
Programming, and click EXIT. Exit the QPST Configuration program.
Unplug the phone, power it off, then back on.
Use P2KSeem to backup the following seems...
Seem 01bf bytes 0000 Record 0001
Seem 01d2 bytes 7A Record 0001
And now for Agent B's tutorial....
--------------------------------------------------------------------
“TUTORIAL Verizon E815 to Bell (Java)"
Since there have been so many requests for an official
tutorial on how to flash the E815 to the Bell firmware, I decided to make a
tutorial. Most of the information is copied and pasted from the following page. http://motorola.szczuka.org/Hollywood_VZW_Bell.html I give full and complete
credit to everyone szczuka has listed on his page. A special thanks to
Mark_Venture and Aenemic Royalty
DISCLAIMER: I am NOT responsible for any possible
damage done to your phone by a non successful flash. The odds of something wrong
are HIGHLY unlikely, but there is always murphy’s law. If your flash is not
successful, then flash back to the verizon E815 monster file and try again. Your
phonebook WILL be lost after the flash. Be smart and use Motorola PST or bitpim
to backup your phonebook.
What the software will do: The bell software will
upgrade many features on your phone. You will notice that you will now how full
Bluetooth without need of seem editing, and most of all, you will have the Java
platform(ability to upload applications for free!!!)
What you need: Data cable, drivers, Motorola PST,
QPST, P2k seems, RSD Lite 3.2, Bell firmware, the Ampd mobile MONSTER FILE!, MMS Package, and the additional files package.(Most
of this can be downloaded from the following website. All else can be found by
doing a simple google search. http://motorola.szczuka.org/Hollywood_VZW_Bell.html and http://www.humpa.com/vzw/
Flashing the phone to Amp’d:
1) Open RSD lite and go to…….(browse). Find your unzipped Amp’d mobile
monster file and click open
2) Make sure your phone is connected securely, fully charged, and has a
full charge. Click start
3) Wait for it to say “flash success!” and then disconnect the phone.
4) Give the phone some time to restart. Do NOT pull out the battery
5) Re-start the phone and make sure everything works.
Flashing the phone to Bell:
1) Follow the steps from the flashing to Amp’d to flash to Bell, only
use the unzipped bell firmware as opposed to the Amp’d
Getting your phone working properly with the new
software ( this is copied and pasted directly from the above website. All
credit is owed to the creators of that website.)
Load Seems
P2Kseem4v710
- Create a folder to backup your existing seems
- Open Motorola PST and minimize it
- Connect your phone to the computer
The computer will detect a "USB Composite Device" and several other virtual
devices.
- Double click the P2KSEEM.EXE from the folder you
extracted the files to earlier.
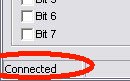
P2KSeem for V710 should say "connected" in the lower left.
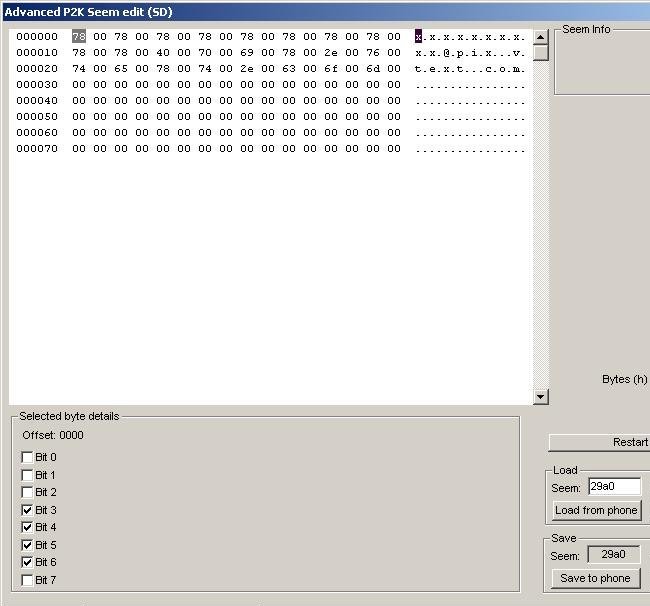
- Type 0000 into the "Bytes" field.
Type 29a0 into the Seem field.
Type 0001 into the Record field.
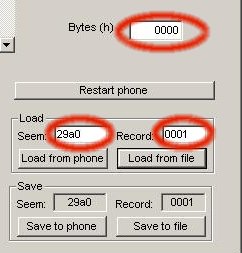
- Click "Load from phone".
- Click "Save to file" and save the seem to the backup
folder you created
- Click Load from File and browse to the 29a0_sample.seem
in the Bell_E815_MMS folder
- Replace the x's with your 10 digit phone number, making
sure to skip a space between digits
Use the arrow key, not the space bar. (Click picture for larger image)
- Click "Save to phone"
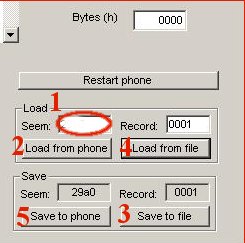
- The procedure for the rest of the seems in the
Bell_E815_MMS is a litte simpler:
- Type the number in the Seem field
- "Load from phone"
- "Save to file" browse to your backup folder and save.
- "Load from file" browse to the Bell_E815_MMS folder
and load the seem file.
- "Save to phone"
Repeat this procedure for each of the following files:
- 2742_0001.seem
- 2997_0001.seem
- 299a_0001.seem
- 299b_0001.seem
- 29a1_0001.seem
- 29a9_0001.seem
- 29ab_0001.seem
- 29b2_0001.seem
- 29b3_0001.seem
- 29b6_0001.seem
- 29ba_0001.seem
- 29bb_0001.seem
- 29bc_0001.seem
- 29be_0001.seem
That's it for seems. Close p2kseem but leave
Motorola PST open for the next step.
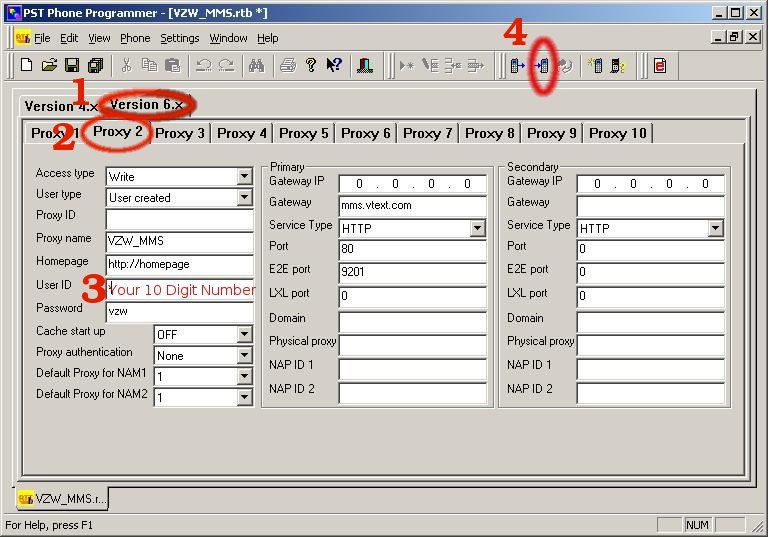
Load WebSessions
- In Motorola PST Click "File" --> "Open RTT 1xBrowser",
browse to the Bell_E815_MMS folder and load the "VZW_MMS.rtb" file.
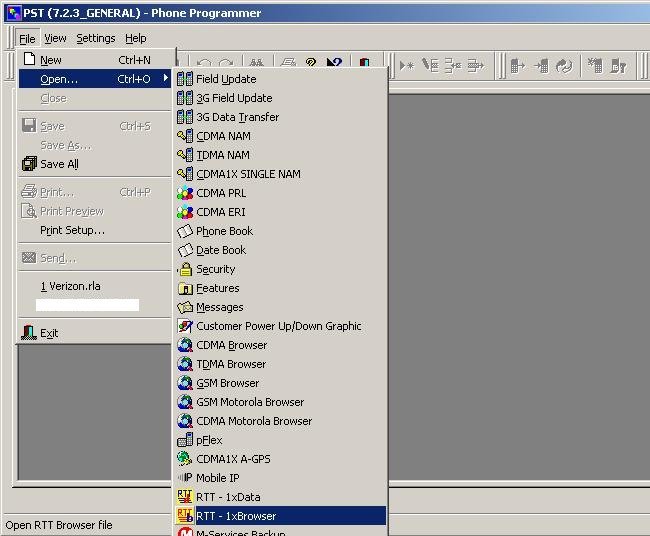
- Click on the 6.x tab
- Click on the Proxy 2 Tab.
- Replace "MIN" under username with your 10 digit phone
number.
- Click on the "Write to phone button"

- Close the Browser file but leave PST open for the next
step
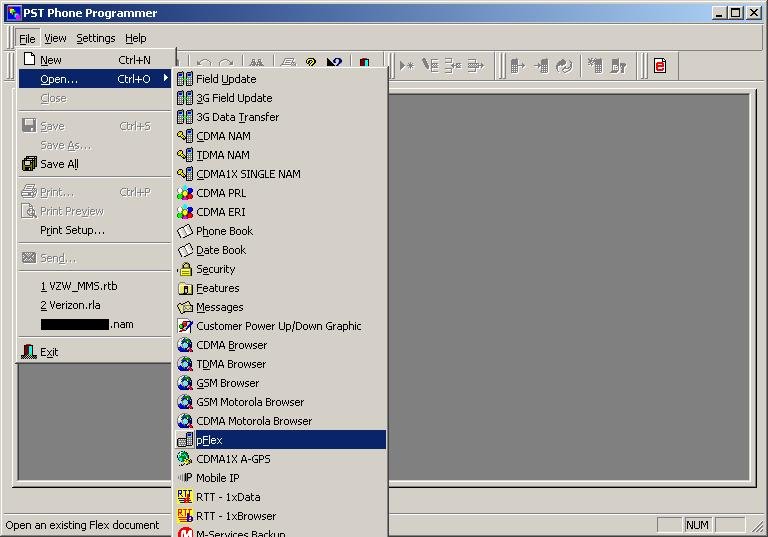
Flex Phone
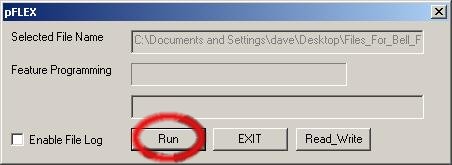
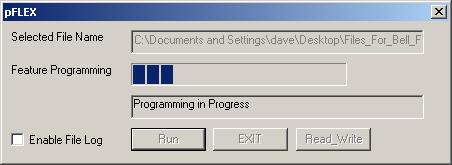
- In Motorola PST Click "File" --> "Open pFlex", browse to
the Bell_E815_Files folder and load the "Create_dir_scarlet.hs" file.
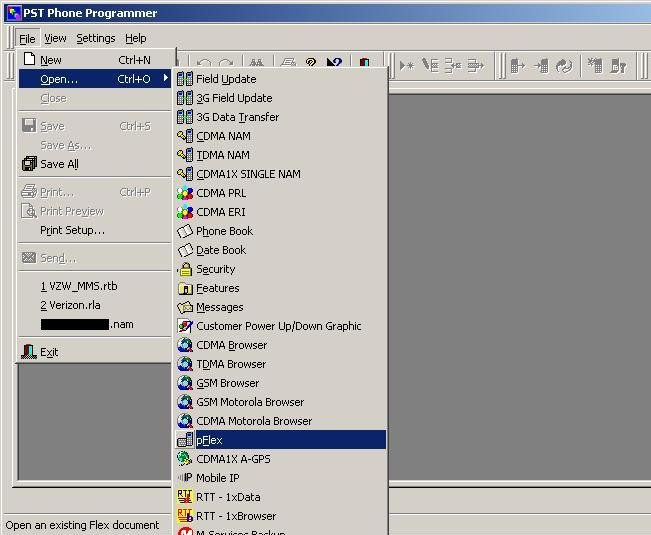
- Click "RUN"
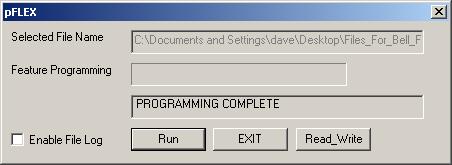
- You're done with P2K mode! Close PST and reboot your
phone
Load Files
This portion of the tutorial uses QPST which means we want the phone to be
detected as a "Motorola USB Modem". If it is not unplug it from the computer.
Turn it off and back on and plug it in again. If you have trouble with QPST go here
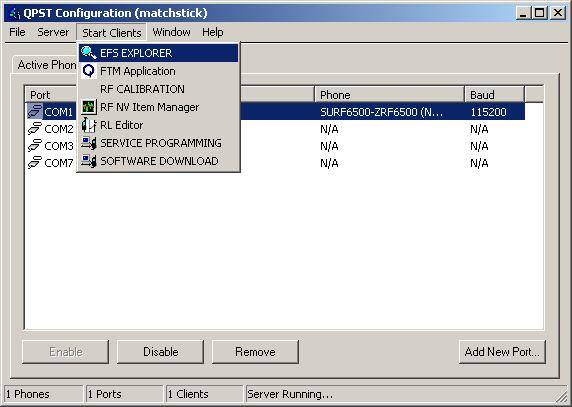
- Open QPST Configuration
- Highlight Your Phone
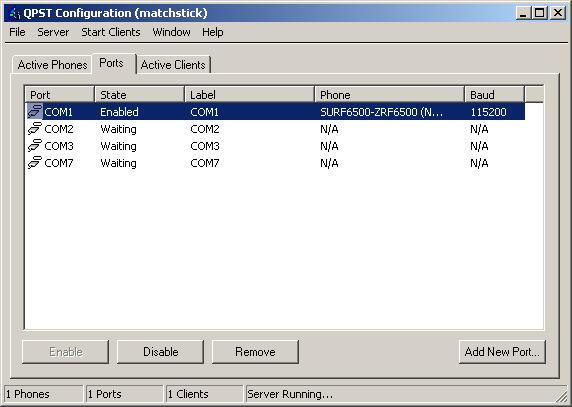
- Click "Start CLient" --> "EFS Explorer"
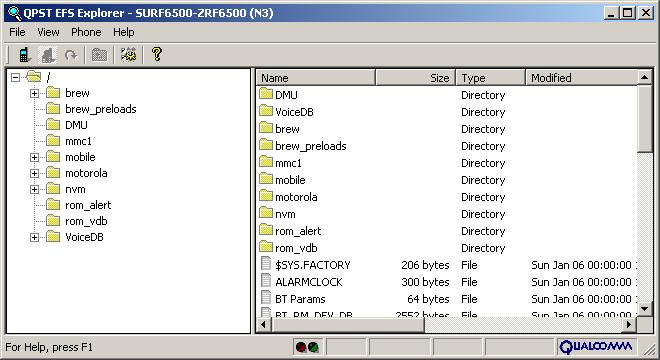
- Browse the phone's filesystem in QPST and drag the
following items into place on the phone.
- Bell_E815_Files\brew\appdb\j2me.settings TO /brew/appdb/
(possibly overwriting an empty file)
- Bell_E815_Files\brew\en\jeodeken.bar TO /brew/en/
- Bell_E815_Files\brew\en\jeodekfr.bar TO /brew/fr/
- Bell_E815_Files\motorola\system\mma_ucp TO /motorola/system/
(overwriting the existing file)
- Bell_E815_Files\motorola\system\mma_dcp TO /motorola/system/
(overwriting the existing file)
- Bell_E815_Files\motorola\shared\jeodek\* TO /motorola/shared/jeodek/
- Bell_E815_Files\motorola\shared\jeodek\skins\moto\* TO
/motorola/shared/jeodek/skins/moto/
- Bell_E815_Files\motorola\shared\jeodek\skins\techno\*
TO /motorola/shared/jeodek/skins/techno/
Tweaking Settings to make MMS work
Navigate on your phone to MESSAGE CENTER==>MESSAGE SETTINGS==>PIX MESSAGE
SETUP==>SERVER INFO==>VZW then MENU==>EDIT
Service Name should be VZW
Server Name should be http://mms.vtext.com/servlets/mms
Web Session Shoud be VZW_MMS
Now mms should work.
Adding Java Apps
http://members.shaw.ca/Anemic_Royalty/
|